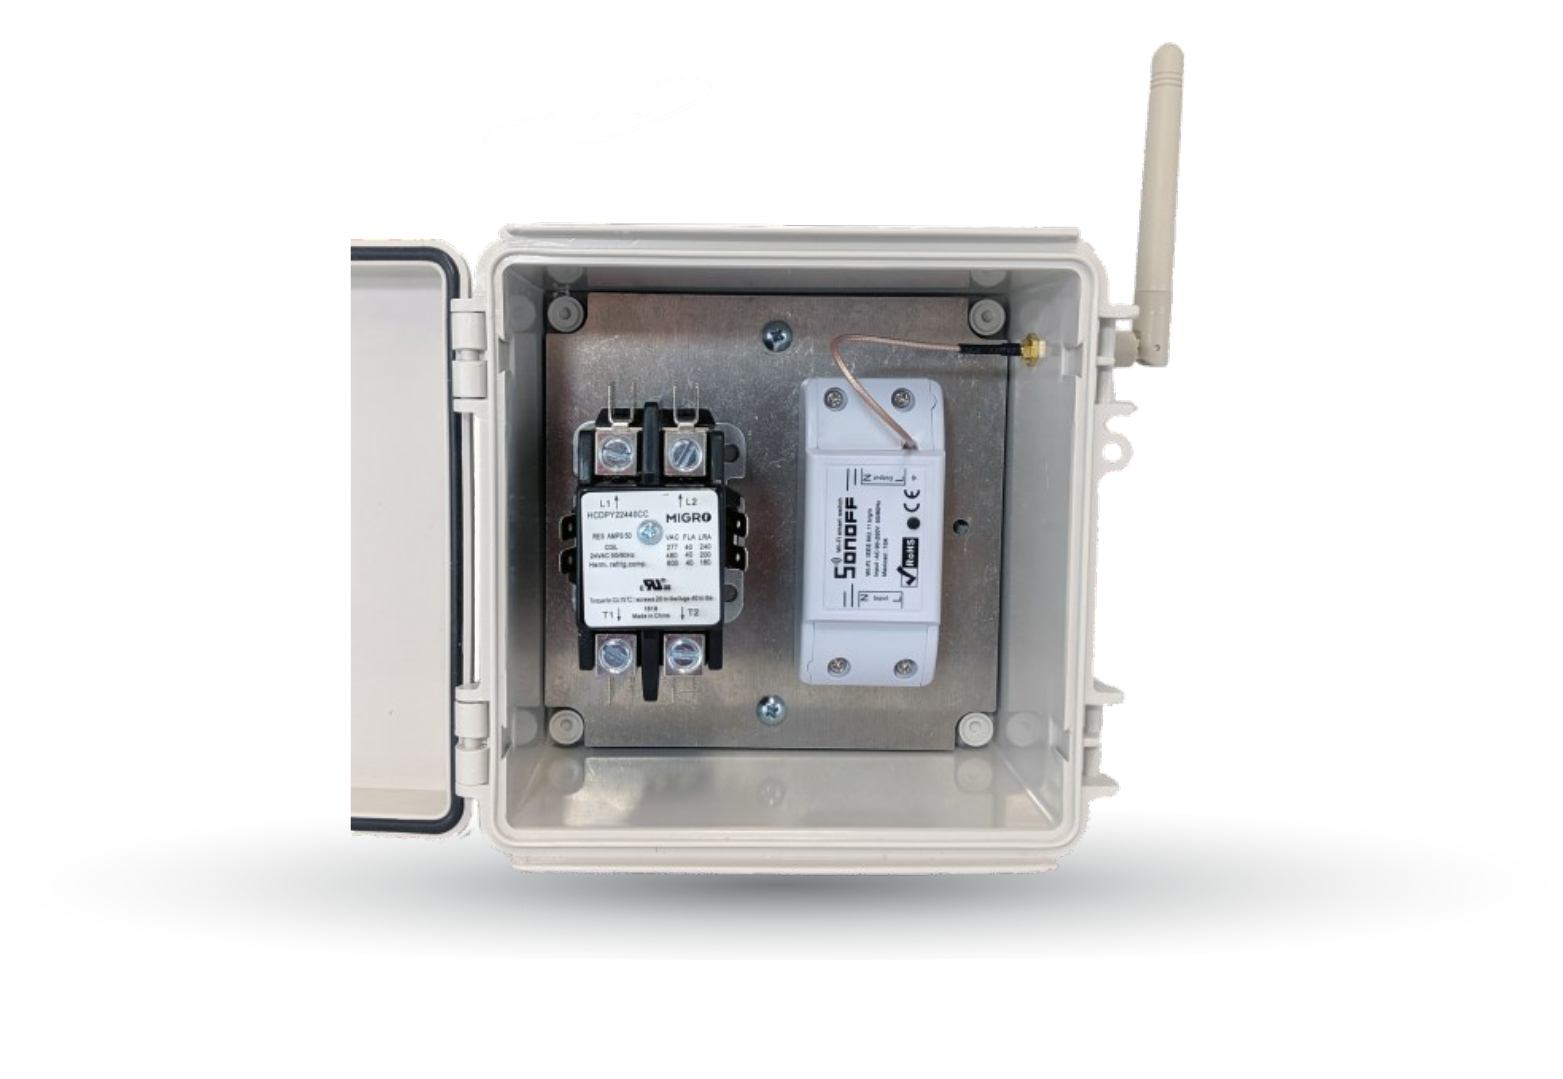
MIGRO Smart Wi-Fi Controller 120VAC User Manual – Part No. M912050
ATTENTION!!!
Connect to Wi-Fi Indoors Prior to Installation
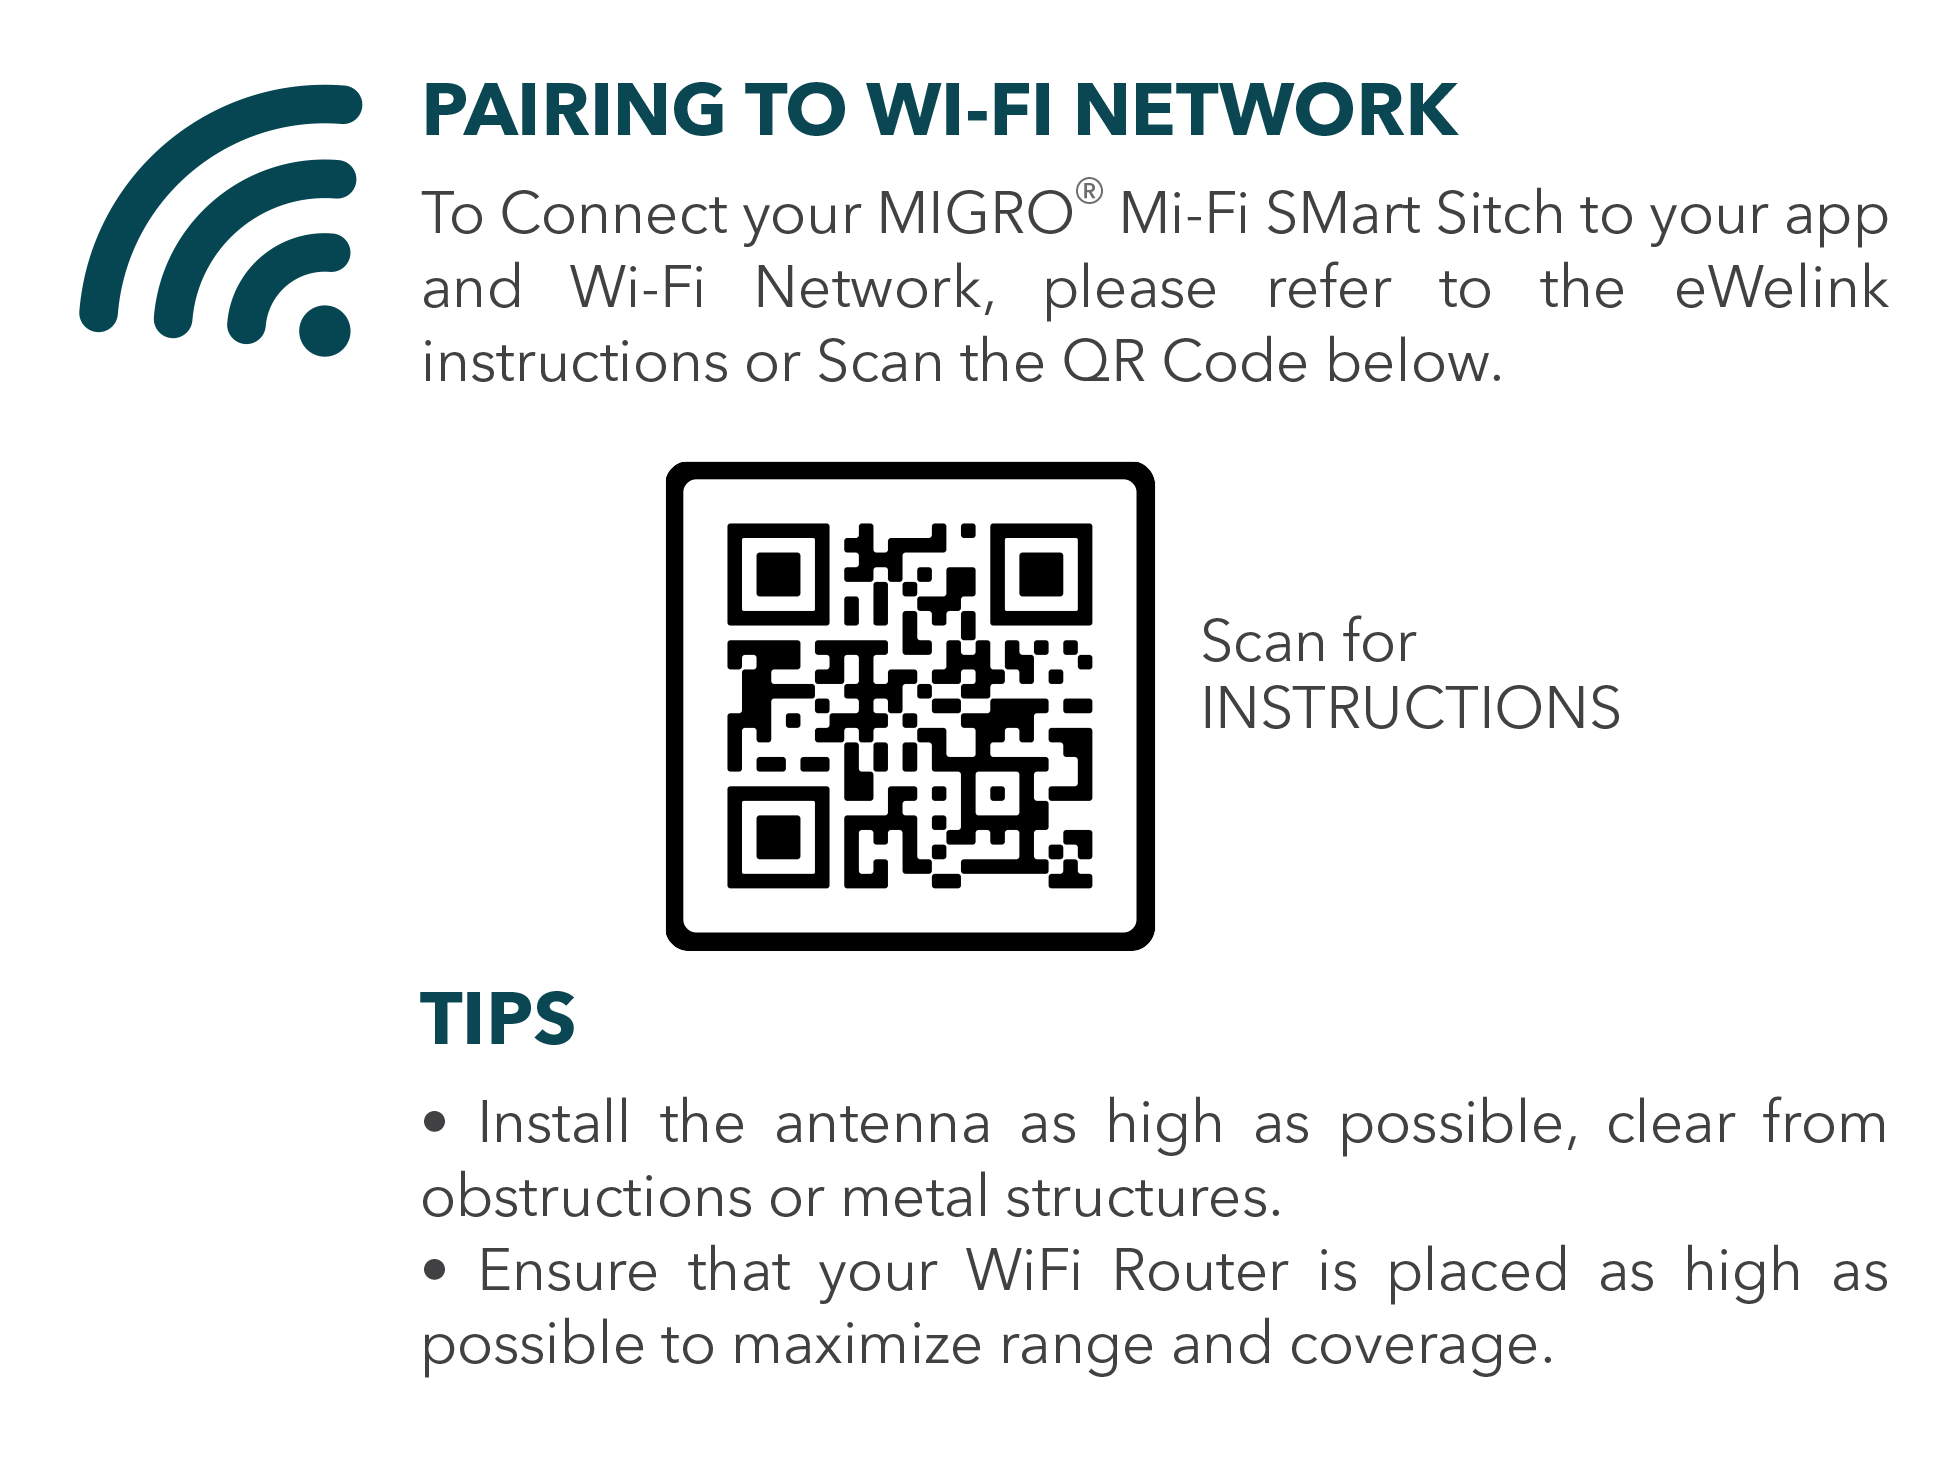
Ensuring your MIGRO Smart Wi-Fi Controller is functioning prior to field installation is required by the manufacturer. Environmental and application specific conditions may cause communication error and a bench test will ensure that the equipment is functioning properly. Connect a 120VAC Power Supply to the System and perform the pairing steps to ensure connection. (see pairing instructions below)
WARNING:
- This Smart Box system should be installed by a LICENSED ELECTRICIAN. Turn Power off at the main panel before servicing this switch or the equipment it controls.
- Wiring must be in accordance with all national and local electrical code requirements.
- This Smart Box Enclosure does not provide grounding between conduit connectors.
Installation Instructions
Your Wi-Fi control system must be installed and maintained as described in this guide to ensure reliable and safe operation. Confirm the voltage and current draw of your connected load to the control output is consistent with the design specifications of this product and that your application will not exceed the maximum load capacity listed.
System Features
WI-FI ENABLED CONTROLS: Use mobile apps as well as Google and Alexa to your system on/off or scheduling.
MANUAL ON MODE: “Manual ON” mode will give you the ability to run your system regardless of the Wi-Fi control status.
BEYOND SCHEDULING: Use the Google, Alexa and IFTTT capabilities to control your systems by weather, workflow Geo-fencing, and others.
OVERRIDE OFF MODE: This mode provides users with great safety protection. The OFF mode will remain OFF regardless of Wi-Fi controls.
Additional Data
Power Supply: 110/120VAC
Relay: DPST
Security: WEP/WPA-PSK/WPA2-PSK
FCC Part 15 IEEE 802.11 b/g/n
Wi-Fi Frequency: 2.412-2.48GHz
Contact Load Ratings
Normally Open
50 A. Incandescent or Resistive Load AC1
40 A. Ballast and General Purpose AC3
5HP @ 120V, 6 KW 120VAC
40 A. Ballast 4.8KW @ 120VAC
ATTENTION!!!
Connect to Wi-Fi Indoors Prior to Installation
Installation Instructions
1. CONDUIT FITTING – Install the conduit fitting provided (or one provided elsewhere) in the desired location ensuring wire clearance within the enclosure.
2. ANTENNA – Install the Antenna provided onto the threaded connector located on the outside of the enclosure.
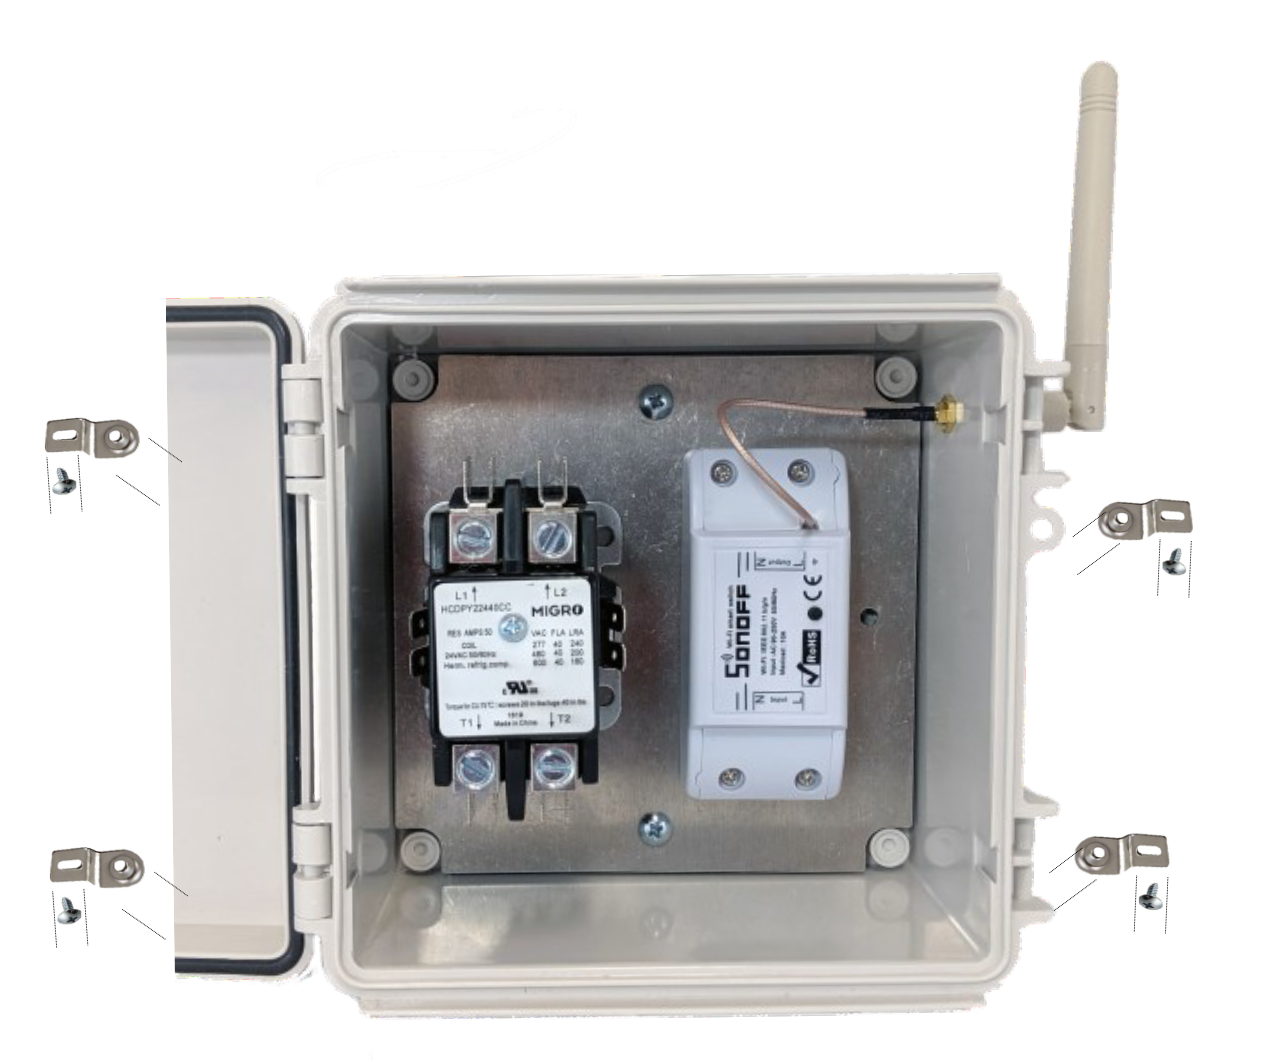
3. MOUNT TO DESIRED LOCATION – Place and mount the enclosure to your desired location using the supplied hardware. The brackets are to be mounted to the back exterior of the enclosure with the wall flanges facing out. (See Image 1)
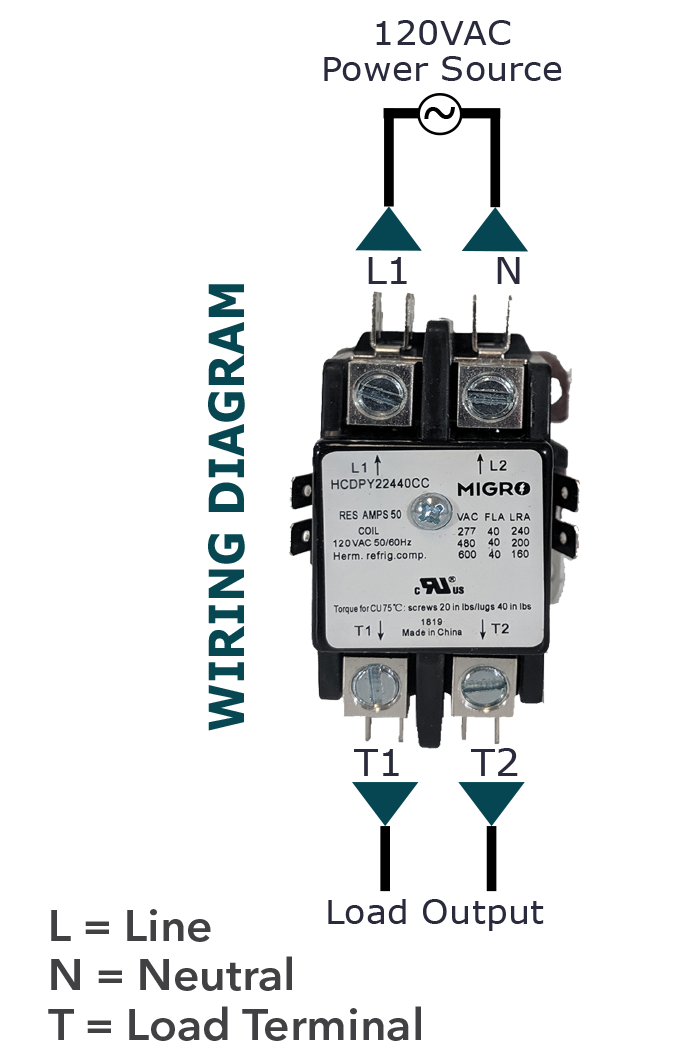
4. WIRE THE SYSTEM – Wire in accordance with the national and local electrical codes (see Wiring Diagram). After wiring is complete, turn circuit power on and test your MIGRO Smart Wi-Fi Controller.
Manual Override: Momentarily press the small BLACK button located on the white Sonoff smart Wi-Fi switch module.


